How to Build AI Agents from Scratch: A Beginner’s Guide to Crafting Intelligent Systems
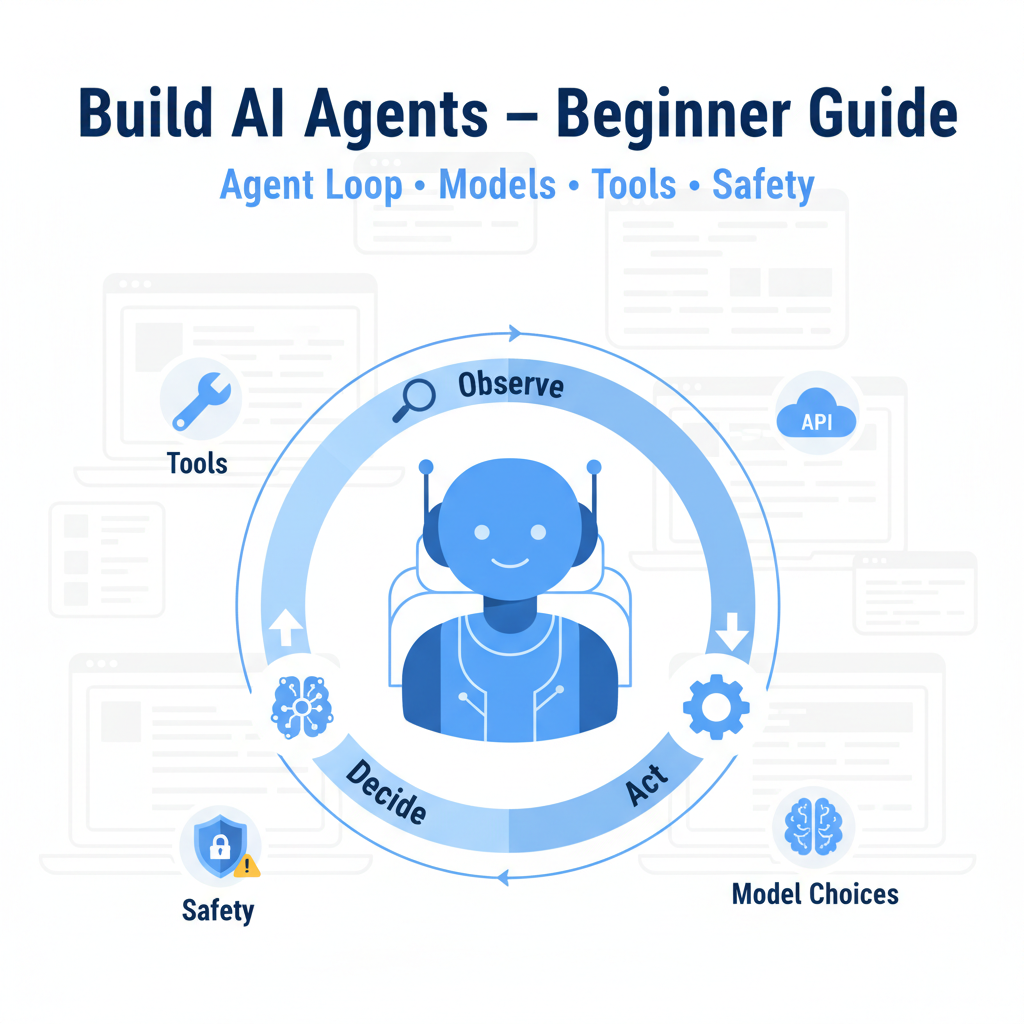
How to Build AI Agents from Scratch: A Beginner’s Guide to Crafting Intelligent Systems
Estimated reading time: 12 minutes
Key Takeaways
- Define a clear goal and choose a narrow use case to guide your design.
- Choose a capable LLM and use tools to perform external actions. OpenAI explanation
- Design simple, well‑typed tools and establish guardrails early.
- Build the agent loop as a minimal, understandable flow. Juntao’s substack
- Consider adding memory, routing/planning, and multi‑agent collaboration as you grow.
- Start simple, then graduate to frameworks when needed. Codewave Beginner’s Guide
Table of contents
- What Is an AI Agent?
- The Core Loop: The “Smallest Useful AI Agent”
- Step 1: Choosing Your AI Agent’s Purpose
- Step 2: Selecting the Right Model
- Step 3: Designing Your Agent’s Tools
- Step 4: Writing Clear Instructions and Rules
- Step 5: Coding the Agent Loop
- Step 6: Adding Guardrails and Safety Checks
- Step 7: Testing, Refining, and Expanding
- The Building Blocks: Basic AI Agent Architecture
- Frameworks or Build From Scratch?
- Practical Technology Stack Options
- Summary: Your First Steps Toward Building an AI Agent
- Conclusion
- References and further reading
Introduction paragraph with emphasis and bold text.
What Is an AI Agent?
At its heart, an AI agent is a system designed to act autonomously towards completing a goal. Think of it as a “digital helper” that understands what you want, decides the best way to achieve it, picks the right tools, and keeps improving itself as it handles that task.
OpenAI, a leader in AI research, describes a fundamental AI agent as having three core parts:
- A model, typically a large language model (LLM), that reasons and understands language
- Tools, such as calculators, search engines, or APIs, that enable the agent to perform specific actions
- Instructions, clear rules and guidelines that direct the agent on what to do, when to use tools, and when to stop
IBM echoes this structure, emphasizing the importance of connecting an LLM with external tools and data sources to generate meaningful outputs at the right moments. Even beginner-friendly tutorials consistently highlight these same components: a model, tools, system prompts, and an ongoing “agent loop” that manages the interaction cycle. OpenAI explanation – YouTube | Juntao’s detailed breakdown | https://anilbohra.me/principles-building-ai-agents-pdf
The Core Loop: The “Smallest Useful AI Agent”
To build an AI agent yourself, it’s essential to understand the agent loop, the process through which the AI continuously reads inputs, decides what to do, acts by calling tools if needed, observes the results, and then repeats this reasoning cycle.
The simplest useful version of this loop goes as follows:
- Receive a user request — the user asks something or gives a task.
- Ask the model what to do next — the LLM processes the input to decide the next step.
- Call a tool if necessary — maybe the model requests to run a calculator, search database, or lookup.
- Feed the tool result back to the model — the agent learns from the output of its tool.
- Repeat the process until a final answer is given.
This elegant loop enables even basic agents to simulate reasoning and decision-making while leveraging tools effectively. It lays the foundation for more advanced features such as planning complex workflows or recalling previous interactions. Juntao’s substack | Nikhil Pentapalli’s Medium article | https://anilbohra.me/building-ai-agents-guide
Step 1: Choosing Your AI Agent’s Purpose
Before any coding, you need to have a crystal-clear understanding of what job your AI agent will perform. Defining a narrow use case is your foundation. Some realistic beginner examples include:
- Summarizing emails
- Answering customer support questions
- Calculating totals or expenses
- Monitoring dashboards and sending alerts
- Simple data retrieval from a knowledge base
Writing the job in one concise sentence helps clarify the scope and focus. Next, explicitly outline:
- Inputs: What the agent receives or observes
- Outputs: What it should produce or do
- Constraints: Any rules or boundaries (e.g., no external actions without approval)
- Definition of Done: What final success looks like
Establishing this clearly makes your agent focused and manageable from the start. Codewave Beginner’s Guide | https://anilbohra.me/automate-small-business-processes/
Step 2: Selecting the Right Model
For reasoning and language understanding, your agent’s brain will be a large language model (LLM) like OpenAI’s GPT or Anthropic’s Claude. Early on, it’s best to choose a capable, general-purpose model to get a strong performance baseline.
Using an accessible API like OpenAI’s allows you to experiment quickly without worrying about the underlying ML infrastructure. Once your prototype proves the concept, you might optimize for cost or speed later. Juntao’s substack | Nikhil Pentapalli’s guide | https://anilbohra.me/open-ai-agent-kit
Step 3: Designing Your Agent’s Tools
Tools are the agent’s “hands” — the abilities it can call on to interact with the world or external services. Good tool design is crucial for predictable and reliable agent behavior.
Some key principles to follow:
- Each tool should perform one specific action only
- Tools must have strictly typed inputs to prevent errors
- The outputs should be clear and structured for easy interpretation
- Risky tools that cause permanent changes (payments, publishing) demand human approval before execution
Common tools include calculators, search query APIs, databases, file readers, and web browsers.
By keeping tools simple and focused, you reduce agent confusion and make your system easier to maintain. Codewave guide | Nikhil Pentapalli | https://anilbohra.me/https-anilbohra-me-n8n-workflow-automation-platform/
Step 4: Writing Clear Instructions and Rules
An AI agent needs explicit instructions that tell it:
- When and how to use tools
- When to stop the loop and return the final answer
- What actions or behaviors are forbidden or off-limits
These instructions often take the form of high-level prompts or system messages guiding the model’s behavior. Building these guardrails early helps prevent unintended or unsafe actions.
Codewave emphasizes guardrails and lessons.
Step 5: Coding the Agent Loop
Now for the exciting part: implementing the agent’s decision loop! You don’t need complex frameworks to get started. A plain Python or JavaScript program suffices.
Here’s a minimal conceptual example in Python:
user_input = get_input()
messages = [system_prompt, user_input]

while True:
    response = llm(messages)

    if response.requests_tool:
        tool_result = run_tool(response.tool_name, response.tool_args)
        messages.append(response)
        messages.append(tool_result)
    else:
        return response.final_answer
This loop:
- Sends the conversation history (messages) to the LLM
- Checks if the model wants to use a tool
- Runs the requested tool and feeds back the result
- Repeats until the model outputs a final answer
Starting with something like this helps you deeply understand how an AI agent “thinks” and acts. Nikhil Pentapalli’s Medium article | Juntao’s detailed loop
Step 6: Adding Guardrails and Safety Checks
Before deploying an agent in the real world, introduce guardrails to keep it safe and accountable.
- Approvals for any side effects like database writes or payments
- Input filtering to prevent harmful content
- Limiting tool use to non-destructive actions unless authorized
OpenAI and IBM recommend making safety an integral part of your design process, not an afterthought. The goal is clear rules and human oversight where needed. OpenAI best practices | IBM insights
Step 7: Testing, Refining, and Expanding
Once your basic agent is running, test it on real tasks. Collect feedback on:
- Task completion reliability
- How well tools integrate
- When the agent gets stuck or confused
Based on testing, fine-tune prompts, improve tool validations, or adjust the loop flow.
With experience, you can expand your agent’s capabilities by adding:
- Memory using embeddings and retrieval-augmented generation (RAG) for recalling prior interactions
- Routing or planning to break complex tasks into sub-steps and choose workflows
- Multi-agent collaboration where several specialized AI agents cooperate on tasks
But beginners are encouraged to master the basic loop and a couple of tools first. Juntao’s roadmap | Codewave guide | https://anilbohra.me/memory-agentic-ai-role
The Building Blocks: Basic AI Agent Architecture
- User Interface: CLI, web app, Slack bot, or API
- Orchestrator: The code that manages the agent loop
- LLM (Model): The AI brain that reasons, plans, and composes language
- Tools: External functionalities like calculators, search engines, or knowledge bases
- Memory (optional): Store for remembering past interactions using embeddings
- Guardrails: Policies, validations, and human checks
Starting with these essential blocks keeps your design clean and manageable while ready for future growth. Juntao | YouTube tutorial
Frameworks or Build From Scratch?
While frameworks like LangChain, AutoGen, CrewAI, and n8n can help you rapidly build complex agents, experts advise beginners to first build their agent loop from scratch. This raw approach reveals the mechanics and helps you grasp how models, tools, and loops interact beneath the surface.
Once comfortable with the basics, frameworks speed up delivery but often abstract away many learning opportunities. So it’s best to start simple, then graduate to frameworks when needed. Nikhil Pentapalli’s advice | Reddit discussion
Practical Technology Stack Options
Here are some popular options for each part of your AI agent, great for beginners:
- Programming language: Python or JavaScript are beginner-friendly and widely supported.
- Model access: OpenAI API (e.g., GPT-4), Anthropic API, or Google Generative AI for experimental projects.
- Tools: Simple REST APIs, calculators, or even custom Python/JavaScript functions.
- Low-code options: Tools like n8n let you design workflows with minimal coding.
- Tutorial kits: Strands Agents SDK provides guided Python tutorials for building agents.
Choosing what fits your experience and project goals makes building easier and rewarding. Nikhil Pentapalli | YouTube walkthrough | https://anilbohra.me/no-code-guide
Summary: Your First Steps Toward Building an AI Agent
Ready for a fast learning path? Experts recommend this step-by-step progression:
- Build a simple chat loop that talks to the LLM with no tools.
- Add one tool like a calculator or a database lookup.
- Add a second tool and teach the agent to choose between them.
- Include memory (embeddings + retrieval) only if your task truly needs it.
- Implement basic routing or planning for multi-step workflows.
- Put guardrails in place before any real-world deployment.
This sequence keeps you focused and confident as you expand your AI agent’s power. Juntao’s roadmap | Codewave guide | https://anilbohra.me/patterns-building-ai-agents-book
Conclusion
Building AI agents from scratch may sound daunting, but by breaking it down into clear steps — defining a goal, selecting your model, carefully designing tools, coding the agent loop, and adding safety — you can create your very own intelligent assistant that performs real tasks.
This hands-on approach not only teaches you the fundamentals of artificial intelligence but also puts you ahead in the rapidly evolving field of AI-driven automation. Dive in, experiment, and discover the thrill of empowering computers to think and act!
If you’re eager, stay tuned — in upcoming posts, we’ll provide complete step-by-step tutorials with code in Python and real-world project ideas to get you started right away.
References and further reading:
- Juntao’s AI agent series
- Codewave Beginner’s Guide
- Nikhil Pentapalli’s Medium guide
- OpenAI YouTube tutorial
- https://anilbohra.me/building-ai-agents-guide
- https://anilbohra.me/open-ai-agent-kit
- https://anilbohra.me/https-anilbohra-me-n8n-workflow-automation-platform/
- https://anilbohra.me/patterns-building-ai-agents-book
Start small, stay curious, and you’ll soon be building AI agents that surprise—and delight!
References and further reading
Frequently Asked Questions
What is an AI agent?
An AI agent is a system designed to act autonomously toward a goal, acting as a “digital helper” that understands what you want, decides how to achieve it, uses the right tools, and improves over time. It typically comprises a model, tools, and instructions guiding its behavior. Sources reference core parts and how the agent loop operates.
What are the core parts of an AI agent?
The typical trio is model, tools, and instructions, enabling reasoning, actions, and governance. See the OpenAI explanation and Juntao’s breakdown linked in the main content for details.
How should I start building an AI agent?
Begin by defining a clear goal and narrow use case, then pick a model, design simple tools, implement a minimal agent loop, and add guardrails. Step-based guidance is provided throughout the article (Step 1–Step 7).
}